The trend of the latest website has been emerging with new designs and creative layouts. The websites now are more engaging and eye-catching due to the background images and videos that portray the identity of the brand. You can set the background image in your site by following simple steps.
Most of WordPress themes either free or premium, provides this feature to add background images in the content body or in the header or footer. These are the techniques to increase the visibility of your content on your website. Without further ado, let’s start adding a background image in your website.
The following steps will help you make your site look amazing!
Step:1
As mentioned earlier, WordPress themes provide the option to add custom background images in the theme panel or from the dashboard. But if your theme doesn’t support this option, no need to worry, there are plugins to help you add custom images.
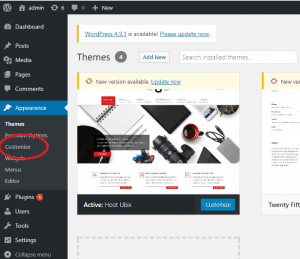
For adding a custom background image, go to your Dashboard and click on Appearance. Now you will see a sub-menu right below the Appearance, click on Customize.
Step:2
On clicking Customize, You will be redirected to your website, from where you will see a panel at the left of your screen with several options that your theme supports
[elementor-template id="8247"]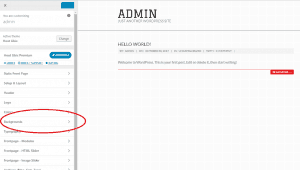
The theme that I have used provides the option to change the background image. However, this theme also supports custom colors and custom patterns too (You can check out the theme I have used in How to upload a WordPress theme tutorial.
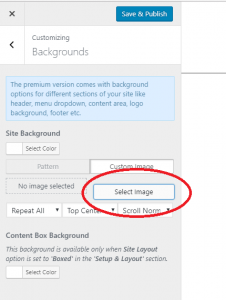
Now Click on the Custom Image option and choose an image from Media library or upload yours.
Step:3
Lastly, choose an image that you like and click on Choose. You will also see a simultaneous change in your website’s look. Click on Save and Publish.

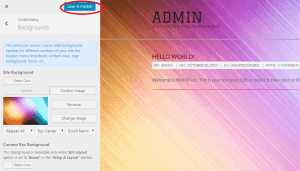
Boom! You got an entire new look of your website!
Check out other tutorials on WordPress at WpStairs and learn all about WordPress in a click!
