You can easily earn money via your blog or website. WordPress offers some amazing tools to do the job. Google Adsense is the most commonly used monetizing tool through which you can earn a fair amount of money.
All you have to do is to set up a Google Adsense account and create ads. Once the add is created, you can use the snippet of code in your website. The code is placed in the widget.
We will further discuss on these steps in this article.
Steps to add Google Adsense in your website
You can monetize your website via Google Adsense just by following two simple steps
- Create and set up an ad in your Google Adsense Account
- Paste the code you got from creating the ad in your Adsense account in your site.
Before jumping into the steps, some prerequisites needs to be done. Those are
- Get a Google Adsense Account
- Get an approval for your site from Google Adsense
- Once your site is reviewed and passed, you can move further for ad creation.
Once, you get your application approved from Google Adsense, you can follow the steps below to monetize your site.
[elementor-template id="8247"]Step 1 : Create and set up an ad in your Google Adsense Account
Sign in to your Google Adsense account. You can simply go to the Add tab on the left panel of the screen and click over it.
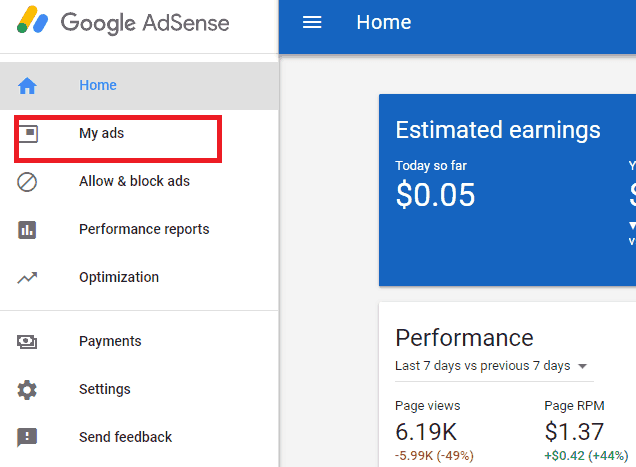
After clicking, you will see a dropdown, click on Add unit button.
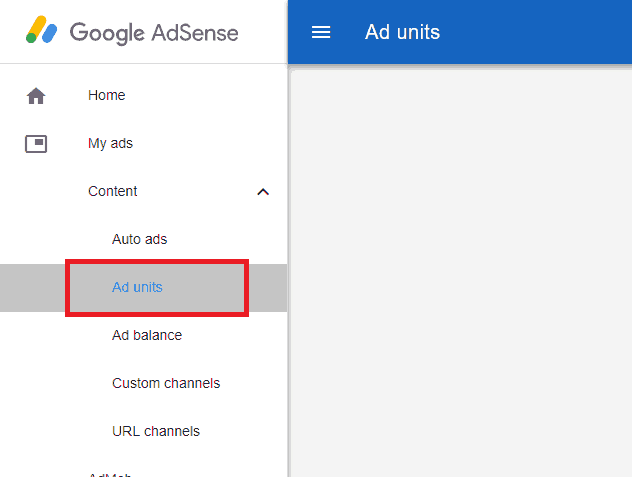
Click on New Ad unit button the create a new ad unit.

When you click it, you will see a different screen with few options given to choose the type of ad you want to create.

Click on the type you want. If you are not certain to what type to choose, you can get an idea through the images in these type boxes. However, you can always choose the first option given. For now, let’s choose the first one, that is Text & display ads.
Once you click, you will be asked to add a name for the ad you just created. Type in any name of your choice. It is better to name the ad using some reference or anything that helps you remember the ad so that multiple ads could be managed later. The name can be anything like “Frontpage ad’ etc
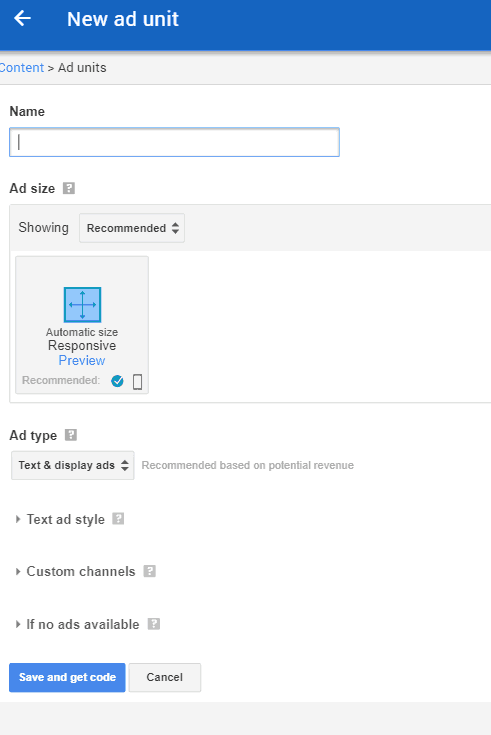
You will also see the size and type settings here, you need to set the size and type of the new ad you created. The size of the ad has a great impact on your site. Some recommended sizes are also there, that are most used by the users. Due to that, they can give you a better payout.
It is better to go with the default settings. For size, choose Responsive preview option and for type, click on Text & display ad.
Below that, you will see few other options
Text ad style
Click on this to add style to your ad’s text. It is better to choose the style that corresponds to your site’s theme and design.
Custom channels
This option helps you to see the performance of your sites. You can track them from here. If you are not interested in that, you can move further leaving this option empty.
If no ads available
In this option, you can choose any of the three option given (see the image below).
This options is set up when Google can not find any ad, so whatever option you choose, it will simply appear there. But such cases does not happen very often.

After that, click on Save and get code button to get the code of your ad to be placed in your website.
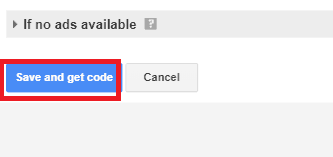
On clicking the button, you will be given a short script that you need to copy and then paste it on your site.
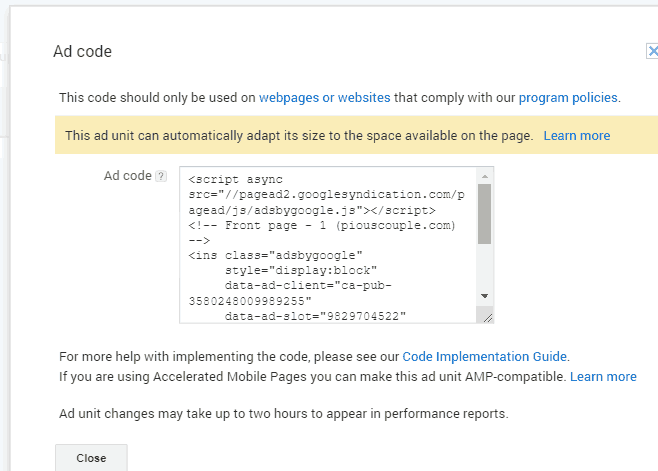
Step 2: Integrate Google Adsense in your website
The code that you copied will be used in your website. Go to the Dashboard of your site and Log in. Go to Appearance on the left panel and click on Widgets.
You can add a widget anywhere you want to put your ad. I have used a Text widget here to paste the code , but you can also use a Custom HTML widget to do the job.
Paste the code in the text tab. And click on save then.
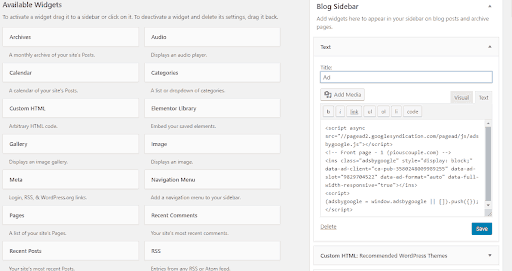
Now, you have successfully added a Google Adsense in your site. Now it can be monetized and based on your need, you can create as many ads as you require .
Points To Remember
- Do not use so many ads in just one post. Due to ad overhead , your visitor might lose interest. Consequently your upcoming traffic will get lower.
- Do not click your own ads falsely or ask others to click on them, in such cases, your site would have a fair chance to get blocked from Google Adsense.
- Do not use ads in an empty page and make sure that you don’t get automatic traffic since it is against the policy of Google adsense.
- Do not use different account credentials for the same person name who is being paid.
- Use Good Content.
- Use keywords that could help the search engine to identify your site.
- Generate better content that could engage your user. Something that make him think that he has visited the right place.
- Keep in mind to make your ad responsive.
- Keep yourself up-to-date with their latest policies.
Approaches to Follow ( Recommended Approaches)
- The first thing to do is to research about Google Adsense. Read the Terms and conditions as it will not accept your site’s application if you are under 18.
- Be cautious for the size of the ad. 336×280, 728×90, and 160×600 are the most commonly used sizes for Google Ads.
- The blocked category can be checked via Google Adsense category blocking feature and avoid placing ads that belong to the categories that do not profit you much
Pin It!! 
Pin It!!


1 comment
Fad
An article made easy to understand yet hard to take your eyes off. Keep it up!