
All of us at one point were beginners, you, me everyone else. If you didn’t know better or weren’t looking for too many complexities, then you probably started your site from WordPress.com. While it has its perks, but there’s no free lunch since it comes with tremendous restrictions and limitations. Limited theme and plugin becomes a major handicap in designing the site. But if you are looking for less restrictions and more freedom, WordPress.org will become your haven. With this awareness, comes an opportunity to migrate from wordpress.com to wordpress.org
While wordpress.com is still popular, it definitely falls short when it comes to manipulating it to your liking and customizing other features. That’s where WordPress.org comes in, allowing you complete and full control of your site. The problem arises when it comes down to the huge data on WordPress.com that you have collected over the years of usage.
So in this blog, I will help you switch wordpress.com to wordpress.org without losing your data, traffic, and subscribers. In other words, the migration will be harmless and only beneficial.
Here’s everything to be migrated:
- Posts
- Feed
- Pages
- Authors
- Media
- Permalinks
- Traffic
What Makes WordPress.org a better Option. Why should you switch?

If you’ve been using WordPress.com for a while and its limits have held you back on numerous occasions from becoming creative, it’s time for you to scale up and migrate from wordpress.com to wordpress.org
[elementor-template id="8247"]Which not only offers you full reign over the themes, designs, plugins, functionality etc but also let’s you go commercial!!
Yes you read it right, go Commercial. Monetize your site. Run Ads, do Marketing, Sell Products, offer memberships and what not.
For this tutorial, we will be following through all the procedures with a step by step guide facilitated by visual illustrations. Let’s start.
Step 1: Signing Up a WordPress hosting company and Setting Up WordPress.org
Since WordPress.com hosted the site for you by providing a storage of 3GB. You don’t know much about self hosting. WordPress.org is called a self-hosted site which means that you yourself take care of the site’s hosting, maintenance, security, storage etc. The perks of self-hosting is you get unlimited storage space as compared to the measly 3GB.
Alright, to start off, first you need a domain name and a good WordPress Hosting Company.
There are alot of good Hosting Service Providers offering pretty decent packages to beginners or new WordPress users.
When you finally decide on a custom domain Name and enlist the services of a Hosting Company, go to WordPress.org and install the provided software.
After installing set it up. Once done, you can move to the second phase.
Step 02: Exporting Data from WordPress.com
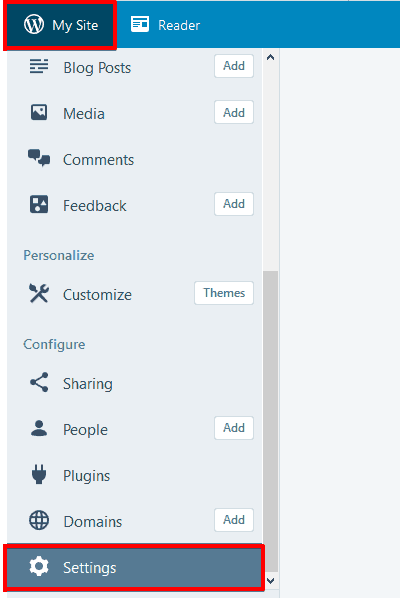
To Export data, using your credentials, first log in to your WordPress.com account. Once you’re signed in, Go to My Site, then Click on Settings.
This will open all settings, scroll all the way down to Site Tools and Click on Export.
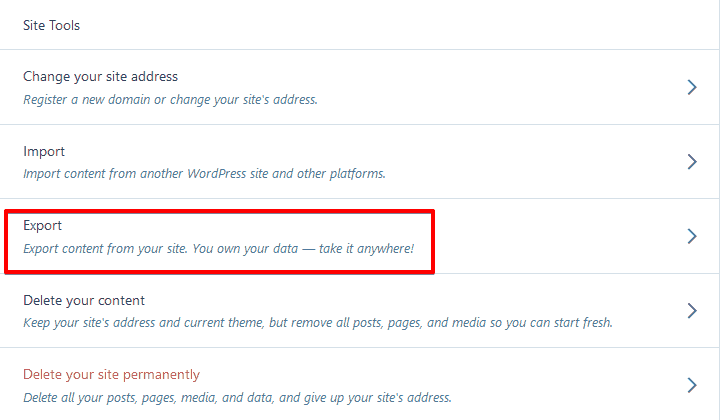
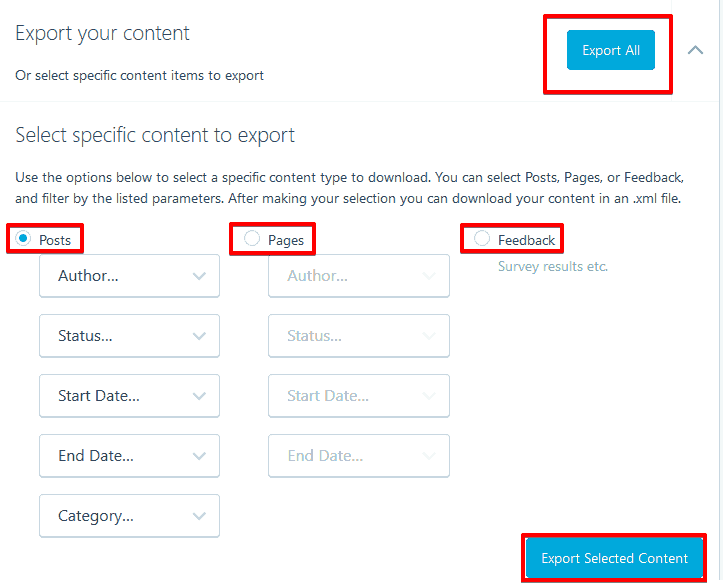
Upon clicking, a new page will open, asking you to select specific content to export between Posts, Pages or Feedback. Make sure you choose none of them and Click on Export All.
Then Click on Export Selected content to move forward.
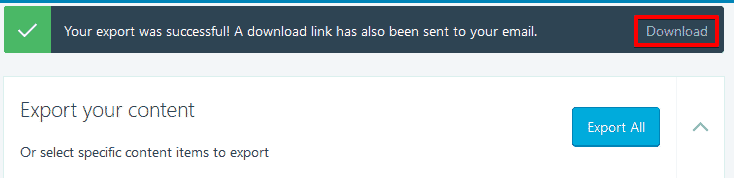
Now your Export file is ready and you just have to download it. A link will be provided on a message that will be displayed at the top. Press on Download, the file will be downloaded to your Computer.
Step 03: Importing the Content of WordPress.com to WordPress.org
Migration Process involves exporting from WordPress.com as shown in step 02, and Importing to WordPress.org as instructed in this step 03.
So the first step is to log into the Self-hosted WordPress site that you set up back in Step 01.
Use your credentials including Username and password to log into the dashboard.
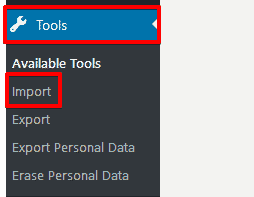
Once logged in, Go to the Tools options on the dashboard menu displayed at the left side of the screen. Under Tools Tab, go to Import.
This will bring up a new page with a list of multiple platforms from where you can import content, comments, feeds etc.
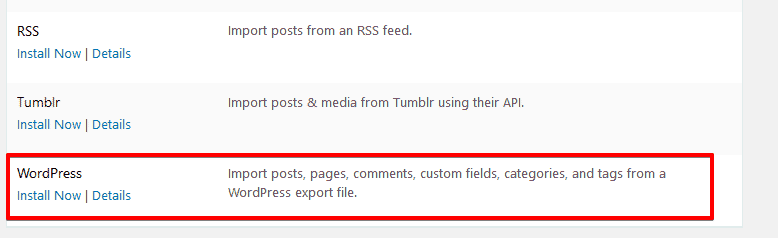
Scroll down until you come across WordPress, which is the last option.
From a WordPress export file, it allows you to import pages, posts, custom fields, categories, tags and comments.
Click on Install Now. This is actually a Plugin called, WordPress Importer. This tool is used to process the XML file created in the first step by WordPress.com.
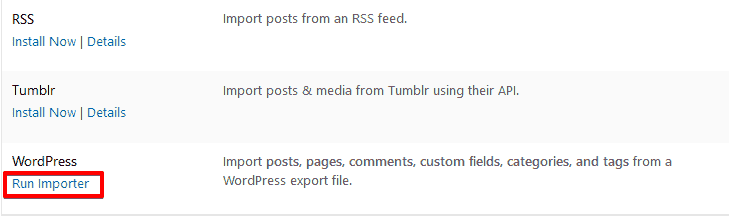
Being a wordpress user previously you know the drill, go to plugins to activate the Importer. Then come back Imports and click on Run Importer.
When the importer Runs, a new window will open up asking you to upload a file. Remember the file you downloaded in step 02?
This is where you will be using it.
Click on Browse. Locate the file on your computer, select it and upload it.
Once done, click on Upload file and import.
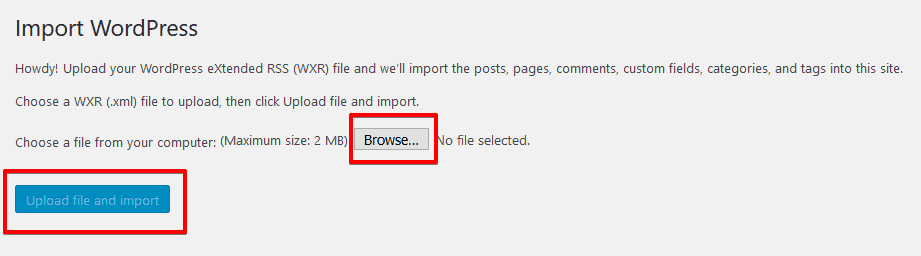
An import point to consider here is the size of your file, as mentioned it should not exceed 2MB. If the file is larger, you can either ask your Hosting Service provider to temporarily increase that limit so that you can easily get through the process. Or you can split your downloaded file into multiple files smaller than 2MB using a file splitter for WXR file types.
Once you’re done importing, you can assign users or create users to your old content. Tick the box under Import Attachments. This will help you import previous attachments.
You have successfully moved all your content and the site from WordPress.com to WordPress.org.
Step 04: Taking Older Visitors along for a ride to WordPress.org
Spare a thought for all those loyal visitors and subscribers. A new site is useless if you don’t have followers. And hey, you collected followers after years of coercing only to end up ditching them now? Nah, but if you don’t take certain measures, you might end up losing your older traffic for good.
So inform them of the switch. Now you could do this by writing a post telling them about the switch and giving a link to your new site.
The second option is to Use the Site Redirect Service provided by WordPress.com. It is a paid service and redirects all your traffic to the new domain. This service will cost you around $13 per year.
Here’s how you can do that.
Log in to your WordPress.com site, go to My Site, in the dashboard, find Settings
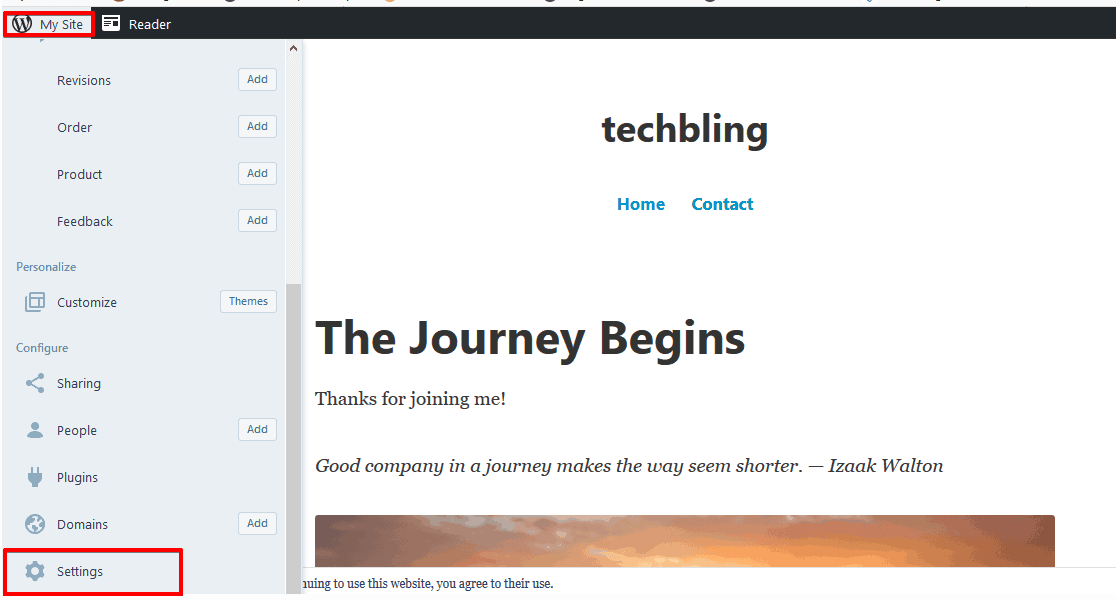
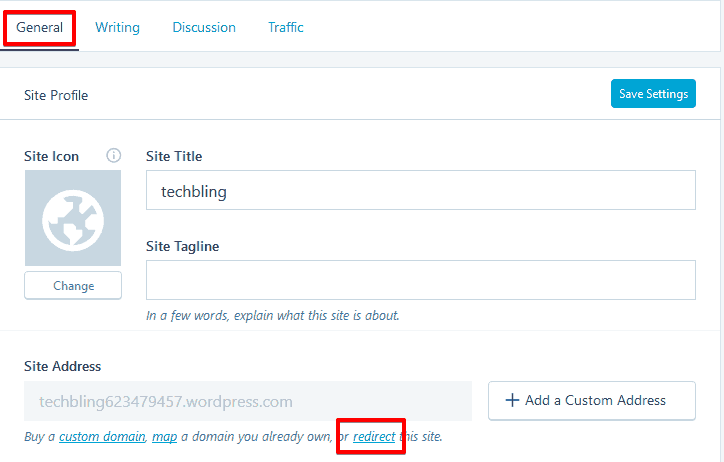
Under the Generals tab in settings. Look for Site Address. Below the bar where you enter the Site Address. You will see the option to redirect this Site.
If you want to go with this method,click on redirect which will redirect you to a new page.
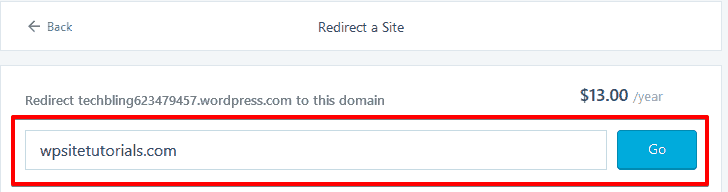
Once you’re here, simply enter your new domain name by typing it out in the address bar.
Once done click on Go.
You will then be redirected to a page asking for your payment details. To complete the purchase of the service. Fill it in, and click on Pay $13.
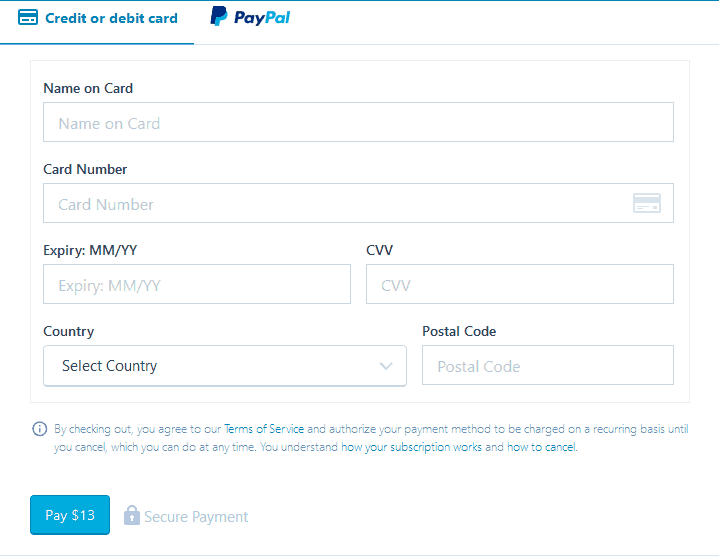
That’s all there’s to redirecting traffic to your site.
Step 05: Jetpack (a Free Alternative)
If you’re not too enthusiastic about paying $13 to redirect your traffic, you might want to consider a free alternative. This is a plugin called Jetpack. This will enable you to transfer all your WordPress email subscribers and blog followers to from WordPress.com to WordPress.org by installing this plugin.
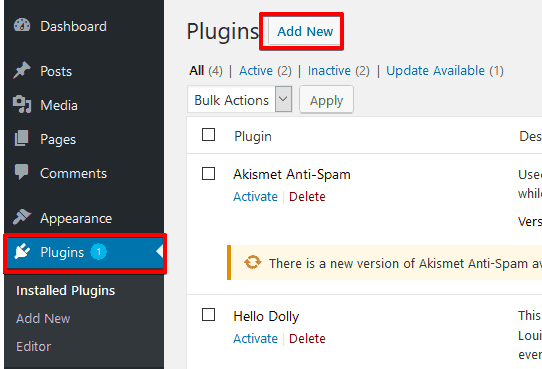
To do that, go the Dashboard of WordPress.org by logging in. Go the Plug in options, Click on Plugins. Click on Add New.
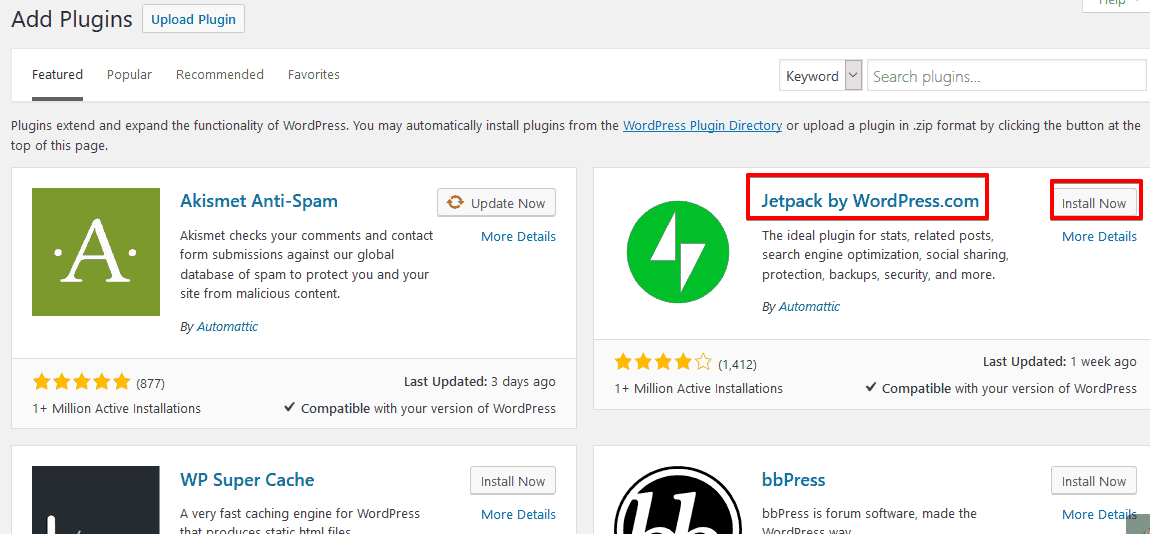
This will take you to the next page, here on one of the first choices will be Jetpack so you will not even need to search for it. Simply click on Install Now.
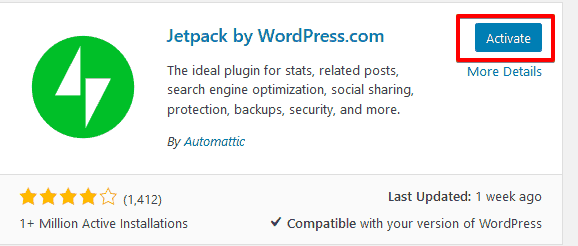
You know the drill here, once installations are done, you will have to activate the plugin to make sure it works. Click on Activate.
This will send you to the Plugins tab where at the top of your screen, you will see a huge Jetpack notification asking you to connect.
Click on Connect to WordPress.com to wind up the installation of the plugin.
Now you’re ready to go!

Step 06: Set the Privacy of WordPress.com
In case you still want to keep the site but want to make sure its not public or visible to all, you will have to set the site to private.
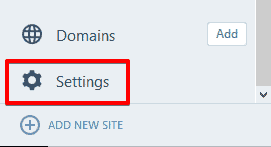
If the WordPress.org site is a fresh start for you and you don’t want to redirect the previous users of WordPress.com to WordPress.org, this is how you can do it. Go to My Site, from the dashboard, click on Settings.
Scroll all the way down to Privacy Options. Click on Private (your site is visible only to you and users you approve).
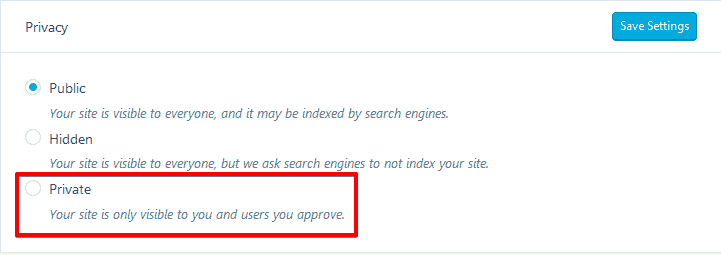
Now the Privacy of the site has been restricted. This way you can keep the old subscribers and visitors of WordPress.com.
Conclusion
WordPress.org opens up a whole new world of possibilities that you were otherwise blind to while using WordPress.com. In terms of both the development and the customization, which makes the migration well worth the effort.
I hope this tutorial of switching from WordPress.com to WordPress.org was easy to follow. If you have any questions I am always here to help. Just drop a comment below. Subscribe for more Tutorials. See you in the Next One! Happy Tech Hunting!


3 comments
Sasha
This is a great tutorial! I have so many people in my Facebook group that asked about this. I’ll make sure to bookmark it so that I can share in the future! Thank you
Colleen
Your post is extremely helpful with the use of detailed images. Thank you for sharing your knowledge and experience with those of us just learning.
Beth
This is definitely a much-needed tutorial. I see many new bloggers ask on how to transfer from wordpress.com to wordpress.org. Very thorough and detailed which us ‘newbies’ require. Well done.