
What is mailerlite?
Mailerlite is of the best email marketing tool for beginners and advance users. We are using mailerlite on several client website as it is easy to manage for beginners. You can create some good looking email templates using mailerlite for free
Why we love it ?
- Send unlimited emails
- Free up to 1000 subscribers
- All features are included in their free plan
- You can automate emails, send customized newsletters
- Mobile friendly
- Drag and drop interface
- Easy to use image editor
- 24/7 support
- Filter your subscribers as you want
- Rss campaign
- Auto resend emails
- Affordable plans
- Easy to understand Campaign reports
Forever free plan
Their forever free plan includes
- Full access to all features (including automation and landing pages)
- Up to 1,000 subscribers
- Unlimited emails
- 24/7 customer support via live chat and email
- Upgrade anytime
How to get started
Getting started with Mailerlite is easy, in fact all the steps that you need to take to complete registration are quite easy.
You can send unlimited emails to 1000 subscribers without even adding your credit cards
What you need to setup Mailerlite account?
- 10 minutes of concentration
- Your personal email / blog address email (e.g [email protected])
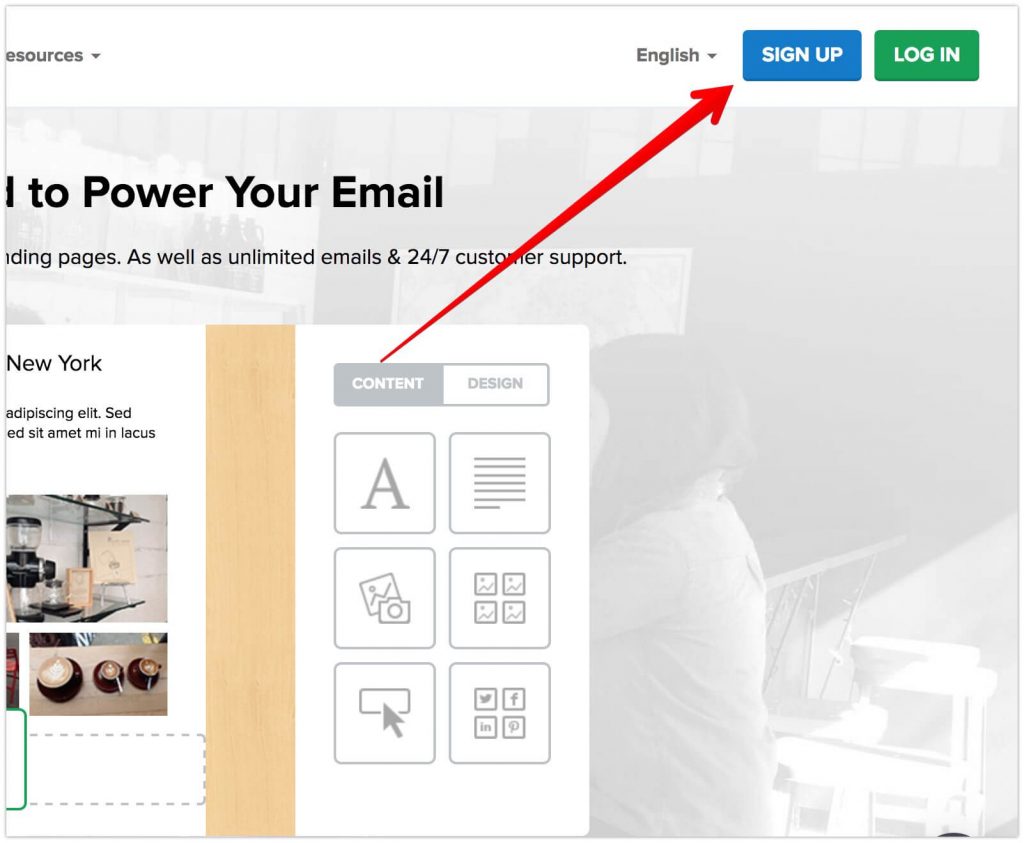
Step 1 : Visit Mailerlite
Go to Mailerlite Website
[elementor-template id="8247"]Click on Sign Up Button on mailerlite home screen
After clicking on sign up, you will get the following screen to fill your signup details
- Company
- Password
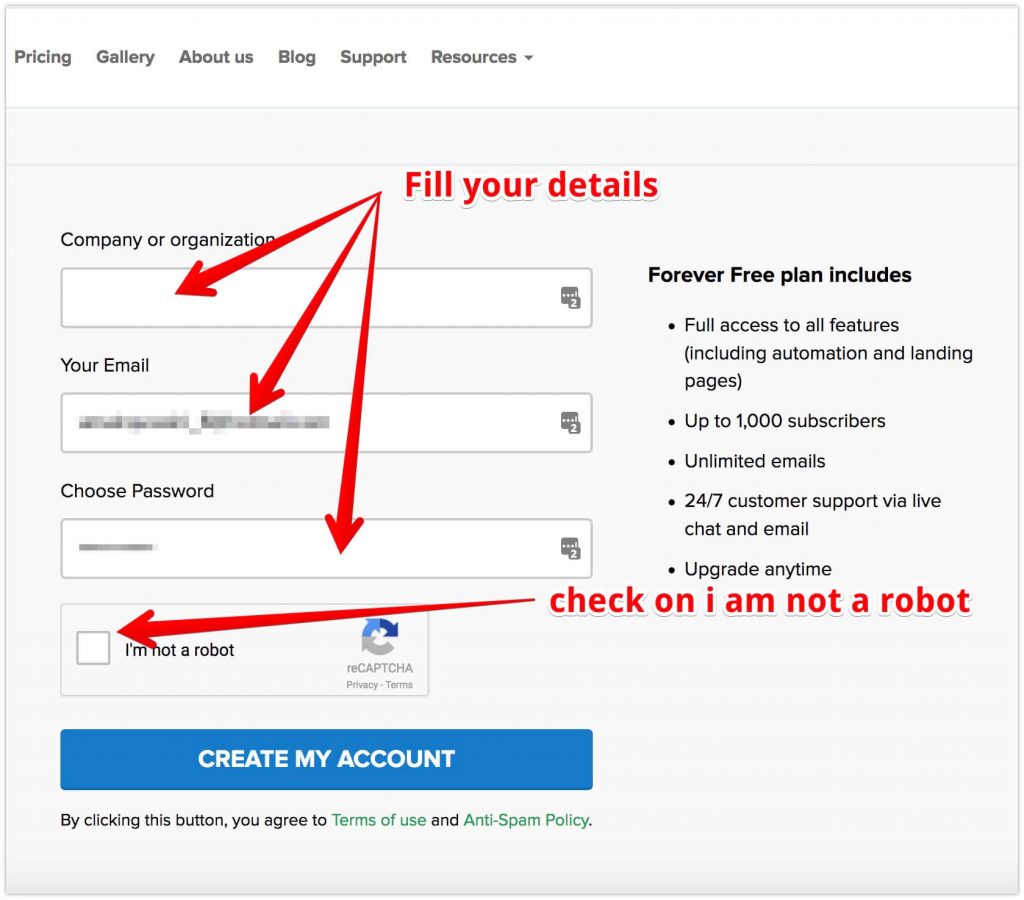
Fill the form with the required information. Now mailerlite will ask you for the following things
- Complete your profile
- Verify your website domain
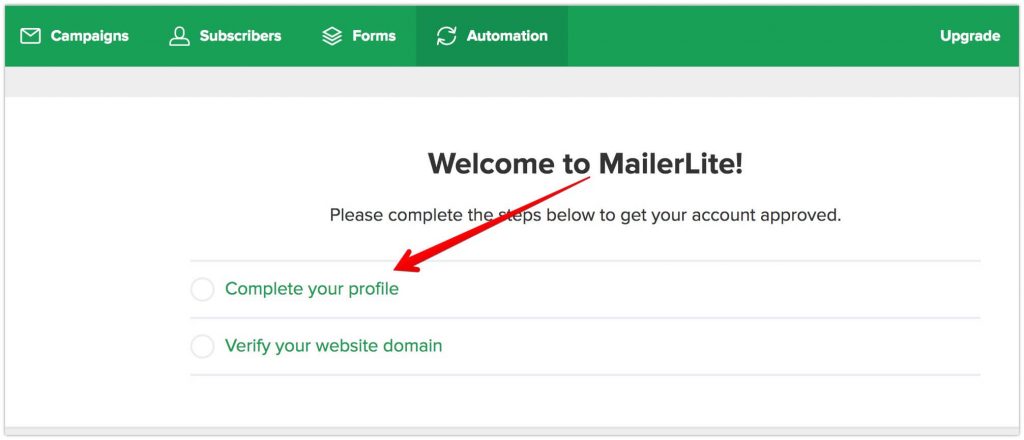
Click on complete your profile
Step 2 : Complete your profile information
After clicking on complete your profile, you will have the following screen
Fill the form with the required information. Select “ i have read Mailerlite’s anti-spam policy and i agree” and then click on Save
After that you will have the following screen
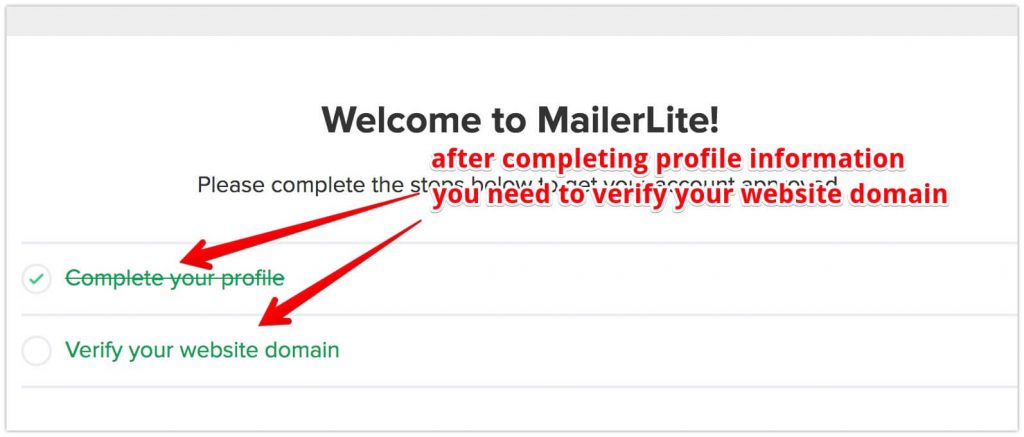
Step 3 : Verify your website domain
Now click on Verify your website domain, you will have the following screen
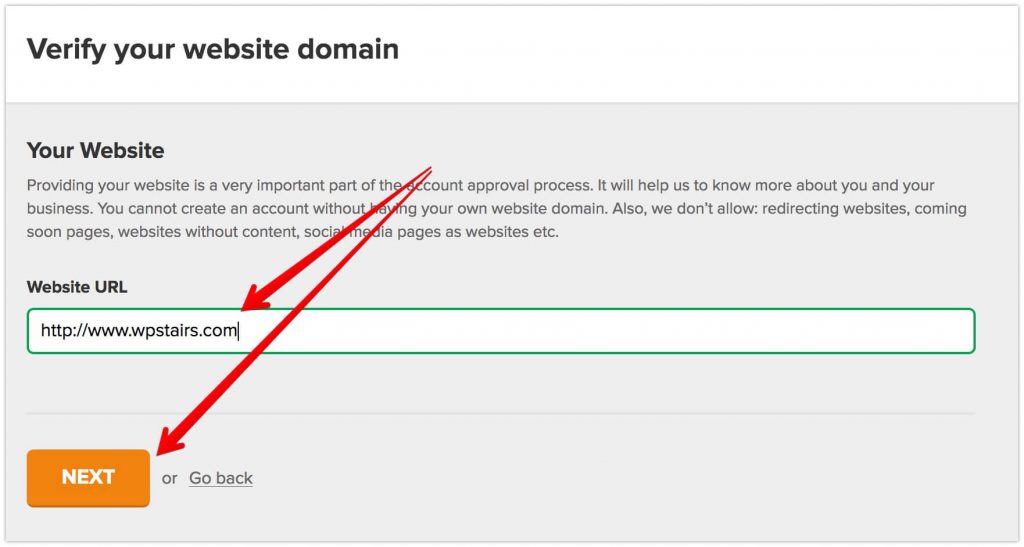
Now enter your website address, where you want to place a subscriber form and want to get subscribers for that website. Click on Next
You will have the following screen
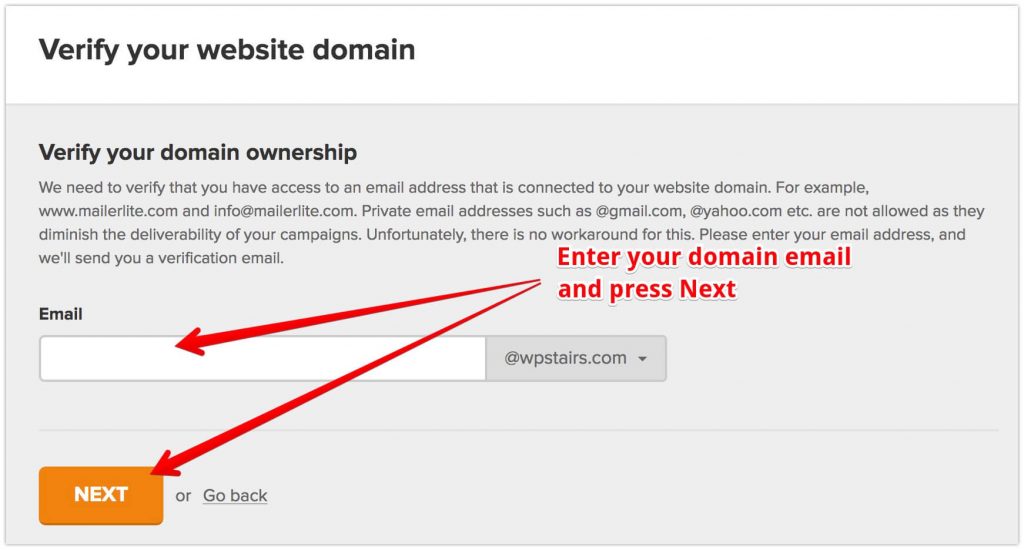
Enter your website email address, from which you want to sent emails to your subscribers. You need to enter valid custom email address like [email protected]
Mailerlite only allow you to send emails from custom email address instead of gmail or yahoo email. As emails from gmail or yahoo email address can go in Spam folder of your users inbox
After entering email address, click on Next. Now you will have the following screen
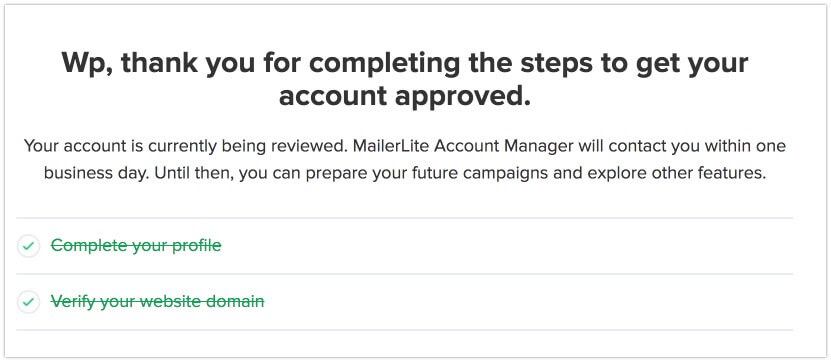
Now you need to wait for sometime, as Mailerlite team will have a look at your blog/website and will approve your request to join this great email marketing tool
Feel free to ask any questions you have!
Mailerlite Dashboard
After your account is approved, you can send email to your users, collect email, create campaigns etc. let’s have a look on mailerlite dashboard
Here how it looks like!
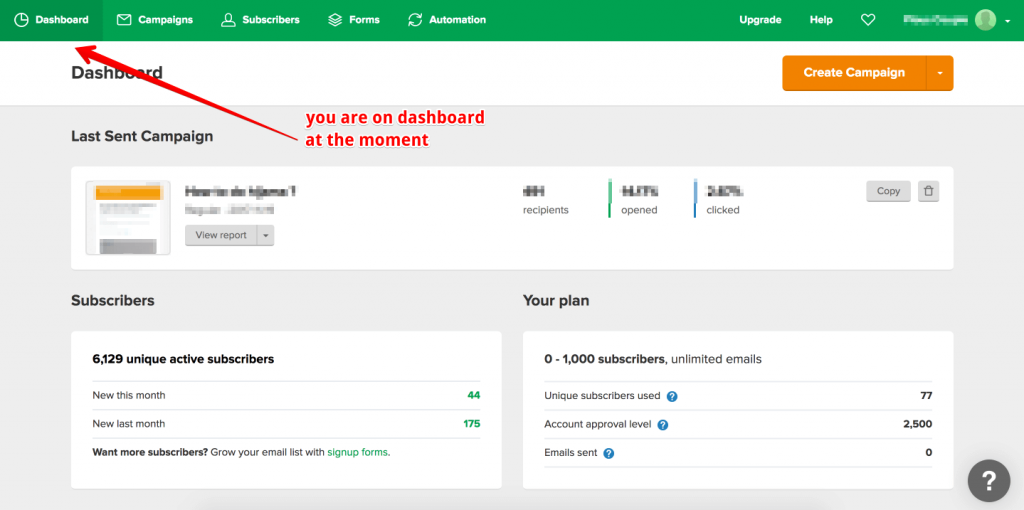
There are 5 tabs on home screen
- Dashboard
- Campaign
- Subscribers
- Forms
- Automation
Let’s discuss things on Dashboard, there are several things on dashboard, some of them are
- Last sent campaign
- Subscribers
- Your plan
- Subscribers Growth
- Monthly Campaign Stats
- Automation
- Forms
Let’s discuss some of these things from dashboard
Last sent campaign
That contains the information of last campaign you have sent with the following information
- Recipients
- Opened
- Clicked
You can copy that campaign to create another or you can also delete that campaign with a simple click
Subscribers
Subscribers block show history of subscribers that are new this month, new last month and total number of active subscribers
Your Plan
This block contains the information about your plan currently activated on mailerlite
- How many emails you have sent this month
- How many unique subscribers you have used this month
- What is your account approval level for number of subscribers
Create your first campaign using Mailerlite
Click on create a campaign button at top right on dashboard, now you will have this screen
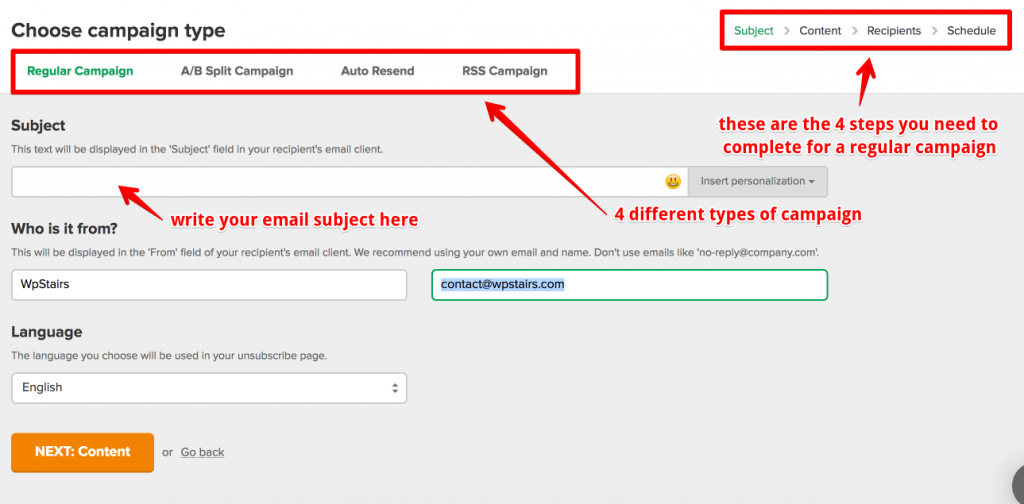
There are 4 options on this!
- Regular Campaign
- A/B Split Campaign
- Auto Resend
- RSS Campaign
Fill the required fields like subject, Who is it from , sender email etc. then click on Next: Content
Select A Template
Now you need to select template for your email
You can select any previously created template from your last emails or you can select from template gallery
From the basic tab, you have 3 options for this too
- Drag and drop editor
- Rich text editor
- Your own HTML
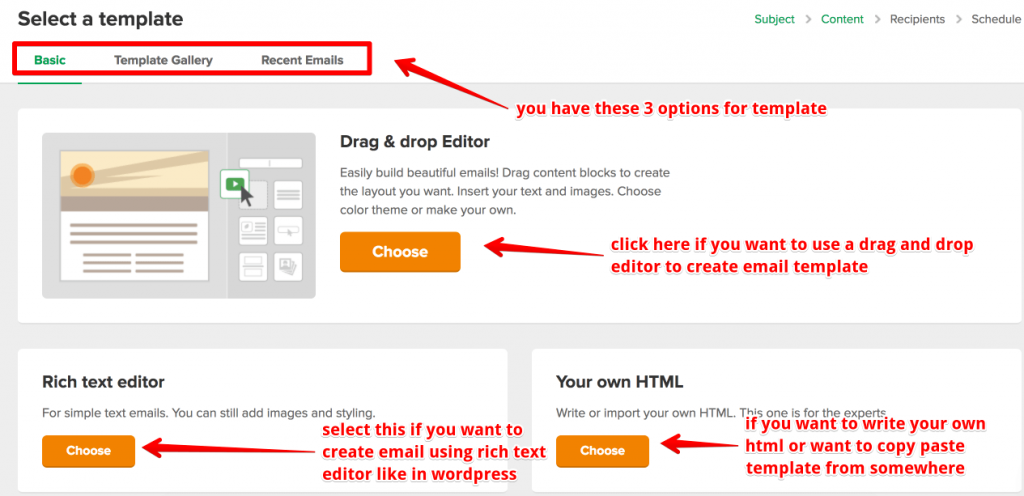
Select drag and drop editor
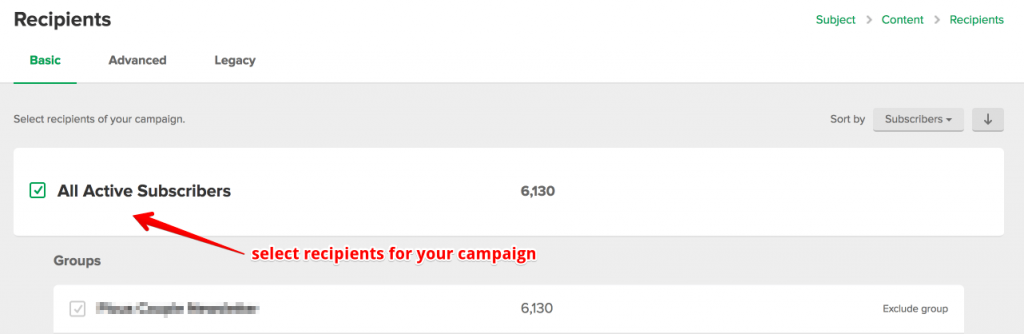
When you click on done editing, it will ask to select recipients. Follow the image below
Scroll down to bottom of page and click on Next : Review and Confirm

After clicking on review and confirm, you will have the following screen
Where you can review the information you have entered before
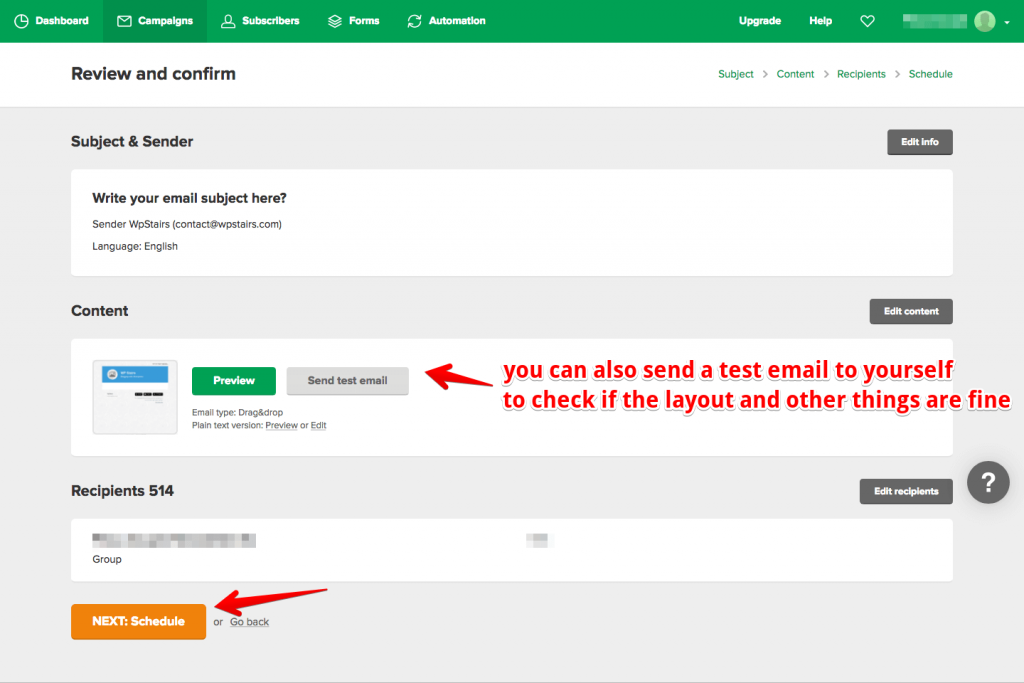
Review the information if you want to change anything
You can also send a test email to yourself to check if the layout and other things are working fine!
After having a review, now click on schedule or send now!
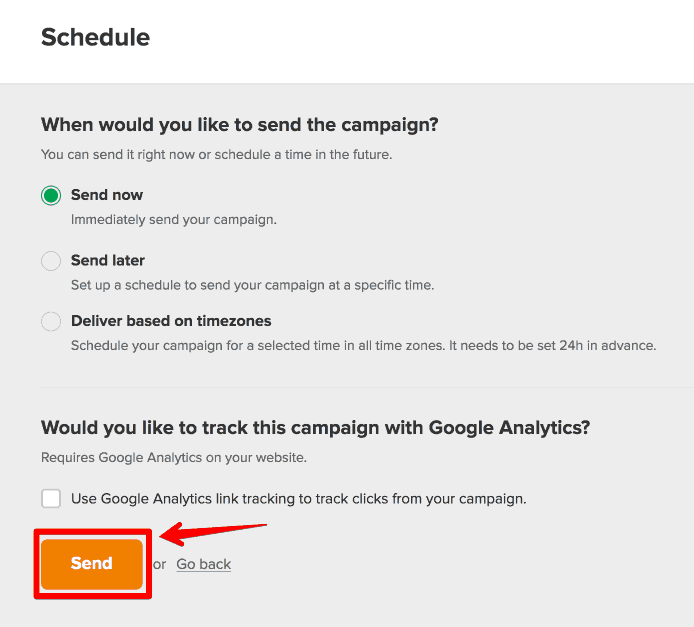
That’s the last step in creating a campaign, have a look at the final screen
As you can see three options in the above image
- Send now
- Send later
- Deliver based on timezone
You can also setup google analytics for this post
We will cover this part later!
You can select the options as you want and then scroll down and click on send!
For this tutorial, i have selected send later option
Once you have clicked on send button, it will redirect you to campaign outbox where you can see your campaign that you have created
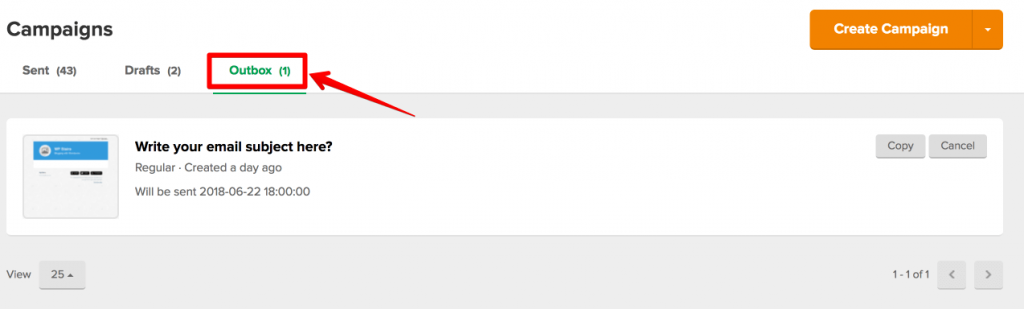
As i have selected send later option from last screen so i can see my campaign in outbox
Now you are done with creating your first campaign with mailerlite, if you want to send automated email to your users when they join your list,

6 comments
Sasha
Great tutorial on setting up Mailerlite for beginners!!
Donna | The Upward Blip
It sounds so easy coming from you! I set up my own mailerlite campaign last week and found it very friendly. Thank you for a more comprehensive explanation of it. You’re amazing!
cheap ray ban
you’re really a just right webmaster. The web site loading velocity is amazing.
It sort of feels that you are doing any unique trick. In addition, The contents are masterwork.
you’ve done a great process on this subject!
Megan
Great guide! I am using mailerlite too. Super user friendly.
Editorial Team
thanks!
Heather
This looks like a great way to grow my business. Thanks for this !!