
Do you want to move from Wix to Wordpress? This tutorial is for you. Wix is an easy to use platform to make a website. The drag-n-drop interface it provides gives an attractive look to the site. Anybody who wants to create a website for his or her small business , can use wix as it provide an easy interface to build your site upon and create some awesome eye catching website too.
However, everything comes with it’s advantage and disadvantage both. Wix is not a good option for a growing business due to its limited features and constraints. Knowing the fact, Wordpress becomes the second best option for business runners to move their site upon, which provides an easy interface along with less constraints and limitations But, the bad news is that Wix does not provide any import or export option through which you could move your site to some other platform. Therefore,for a growing site with a huge bulk of data, you gotta transfer the whole data of your website manually!
Looks tiring right? No need to worry, we will share some easy steps to quickly move your site from Wix to Wordpress. Let’s see the steps we need to follow to get the job done.
Steps to move from Wix to Wordpress
- Buy a hosting for your wordpress website.
- Setup a domain for your Wordpress website.
- Install wordpress and setup your website.
- Import your blog posts from Wix website to Wordpress website via Wix RSS.
- Setup pages and add the links to the navigation menu.
Step :1 Buy Hosting
The first step to move your site from wix to wordpress is to but a new web host service to host your wordpress website. Since Wix is a user friendly platform and it allows you to host your website automatically so you don’t need to worry about the accomodation of your website on the internet, due to this, Wix also have some limitations. However if you move your website to wordpress, you gotta buy a slot on the internet for your website because wordpress is a free content management software which requires a hosting.
We recommend you to go for Bluehost or Siteground which provide amazing web hosting and customer support. In case of any mishap to your site, these hosting providers provide amazing support and guidance to the novice users.You can learn how to buy a hosting and how to setup wordpress on it in few steps and but these hostings form our affiliate links with some amazing discounts.
[elementor-template id="8247"]After buying a hosting for your new website, let’s move to the next step that is setting up a domain for your site.
Step: 2 Get a Domain
Now you need to get a domain for your website. If you want to switch from Wix to wordpress using the same domain name (assuming that your Wix website is setup on a your personal domain), it is better that you set up a temporary domain because your current domain is already used and your website is already published by Wix.
There are quite many host providers which will provide you free domain but in case you do not want a new domain, you can set up a subdomain as per your bought hosting plan (as different hosting plans provide different packages for subdomains).
Subdomain is a part of your primary domain which is assigned with a unique name with respect to your user account. While working with Wix, It provide a free subdomain to its’ users to help them run their small businesses but if your business is growing and demands for a better platform, you better buy your own personalized domain for branding your business.
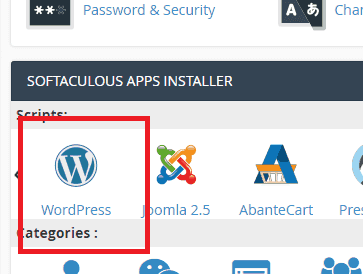
Step:3 Install Wordpress
Afterwords, let’s install wordpress for your website. Some hosts provide an easy one click installation of applications like wordpress, joomla etc. Let’s stick to wordpress only for now. To install wordpress, simply log in to your cpanel and scroll down to application installer.
As it is said earlier, some host providers give a one-click-install so for instance if you have purchased hosting from Bluehost, you will see a “Install Wordpress” option under Website panel. However some hosting providers use third party scripts to do the job. To know which hosting provider is the best for you, visit https://wpstairs.com/wordpress-hosting/ to get a thorough idea of which hosting provider will suit you the best.
Considering the second case, install wordpress by clicking on the wordpress option under Apps Installer panel and install wordpress following the instructions. Read the instructions and steps carefully to install wordpress on your primary domain address.
Now after installation, simply click on your site’s administrative URL eg . www.yoursitename.com/wp-admin/.
Enter the username and password that you entered while installing wordpress (instead of admin as username and pass as password).
Boom now you have proceeded to the Dashboard. Its time to setup your wordpress blog now.
For setting up a blog, the first thing that’s required is to install a beautiful theme for your blog. Simply install any theme you like, free theme or premium one is your choice. To further get down to the nitty gritty of how to install wordpress theme, visit https://wpstairs.com/install-wordpress-theme-detailed-guide/ to learn the process in detail.
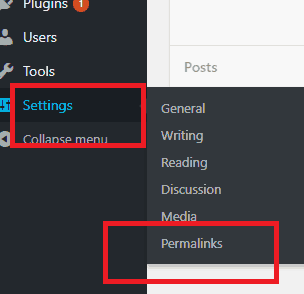
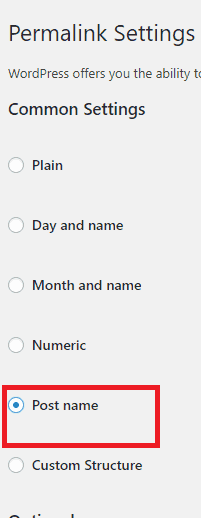
It is feasible to change the permalinks of your site as well from www.yoursite.com/2018/site/10/blog-title to simply www.yoursite.com/blog-title . to change the permalinks simply go to the Settings option in the left panel on your dashboard and navigate down to Permalinks and change the setting as desired. In this tutorial, we have chosen “Post Name” as our preference.
Step:4 Transfer your content
Since you are done setting up a theme for your new wordpress blog, let’s now move the blog posts from Wix to Wordpress. Now the problem with Wix is that it doesn’t provide any option to migrate the blog content from one platform to another. To fulfil the job, you either need to manually create all the block posts and paste the content . Much tiresome isn’t it? Fortunately there is another way to do the job, that’s importing the Wix RSS feed to the wordpress blog.
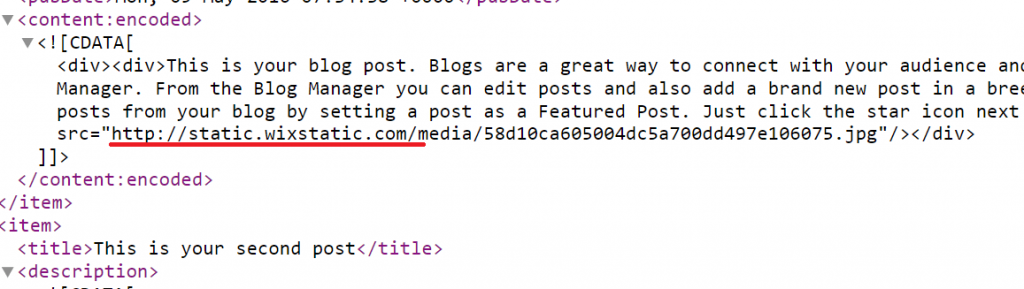
To locate RSS file, you simply need to enter your Wix site’s URL (enter the one that you want to get migrated whether it is the premium one or the free one for instance username.wixsite.com.blogname or www.yoursite.com) then enter /feed.xml right after your site’s URL. You will see a file will show up with some code in it.
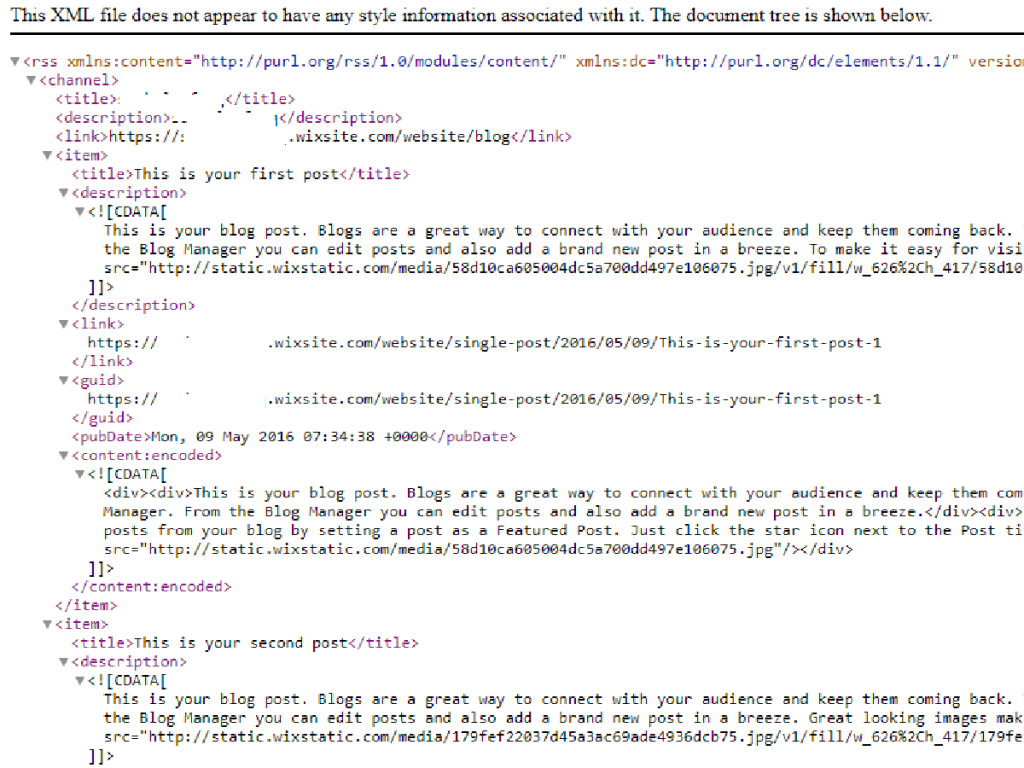
Simply right click on this screen and save as the file with the desired name.

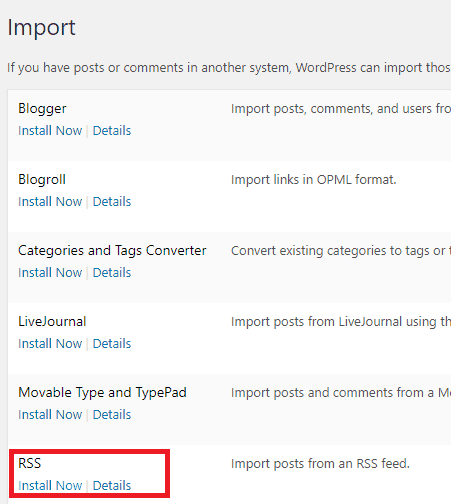
Once you saved your RSS file, go to the dashboard and click on Tools in the left panel and navigate down to Import option.

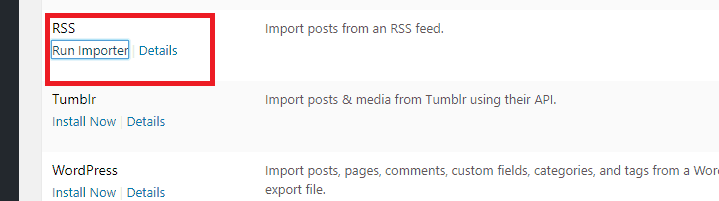
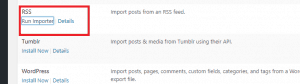
Click on install RSS and then click on Run importer.
After you run the importer, you will be asked to import the RSS file for your website, Simply click on Choose File option to choose your Wix RSS Feed and click on Upload File and import .
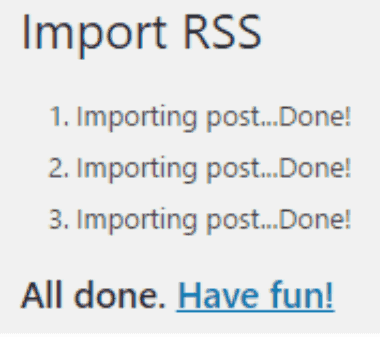
Now as your Imports have been completed , you can check it out by clicking on post option to the left panel of your dashboard and you will find them all there.
But since the import is done only on the content of your blog posts not on the images, as you can see the source of image will still be on wix site
Therefore you will need to take the help from plugins which will provide you the features and functionalities to do the job. For this,we will recommend to use Import External Images plugin for importing images from Wix.
Now Once you are done with installation and activation of the plugin, go to Media and click on Import Images. In the Options tab, click on “All Images” and then clock on Import Images now , It will import all your images within a span of seconds and will confirm you by a message.
Step:5 Import Pages
After you are done importing your complete blog posts, it’s time for the pages to be imported. Unfortunately, there is no easy way to automatically import all your pages to wordpress , hence you will have to create all pages from scratch. To do dis simply go to the Pages option on the left menu and click on the Add New button and then Enter the title of your page (eg: Home)
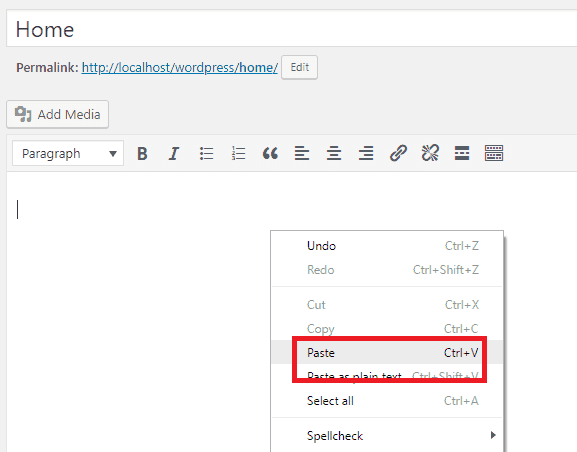
After that, go to your Wix site and copy the content of the page.

After copying the content, simply go to the wordpress site’s page and paste the content there.
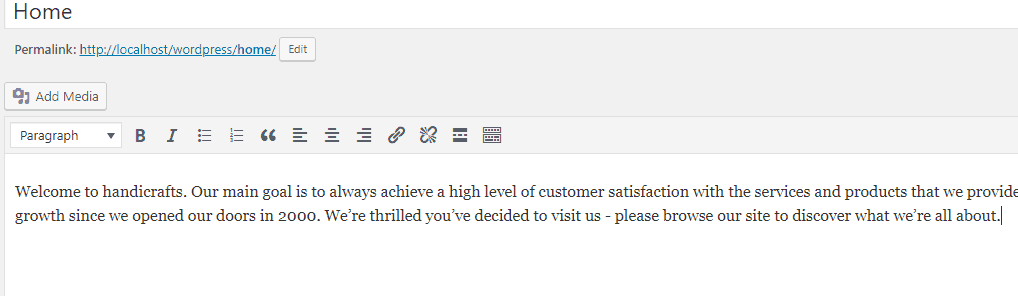
Then Click on Publish.
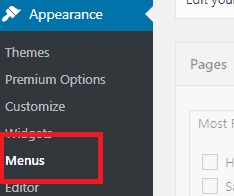
Now as you have re-created all your pages, It’s time to make a navigation menu. Simply go to the Appearance then Menu option and create a main menu for your site.then click on Create Menu.
Drag out all the relevant pages that you created for your site and boom! You are all done migrating your blog from Wix to Wordpress.
To learn more about Wordpress, Visit https://wpstairs.com
