Social media platforms can rather be exhausting trying to validate your work from everyone that’s around. In order to stay relevant you need to post every now and then so that your audience stays engaged.
There are several tools available in the market to schedule unlimited blog posts to Facebook Page. Some of them are paid and some of them are free. Everyone is looking for a free solution if it works fine. Some of them are
- Buffer
- Hootsuite
- Post Planner
- Tailwind
There are so many other social media sharing tools available in market
IFTTT
IFTTT stands for IF This, Then That and it’s a free tool that allows you to connect two tools together and automate basic actions. I use IFTTT for the following things
- Share newly published blog posts to Facebook, Twitter,Pinterest etc
- Schedule unlimited blog post to Facebook, Twitter
- Share my Instagram photos as native images on Twitter, Facebook.
- Say hello to new followers on Twitter
In start many people don’t know how to use IFTTT and they thought it was too much crowded with applets
[elementor-template id="8247"]What are applets?
Applets are just like triggers. They help to bring different services together and create the magic for you
what are the services?
Services are the apps and devices you use every day. Each service has useful Applets you can turn on.
Schedule unlimited blog posts to Facebook
Let start doing the things for which you are waiting for
Step 1. Visit www.ifttt.com
Visit https://www.ifttt.com and create an account if you don’t have
After creating an account and completing all the required information, login to that account
You will have a dashboard like this
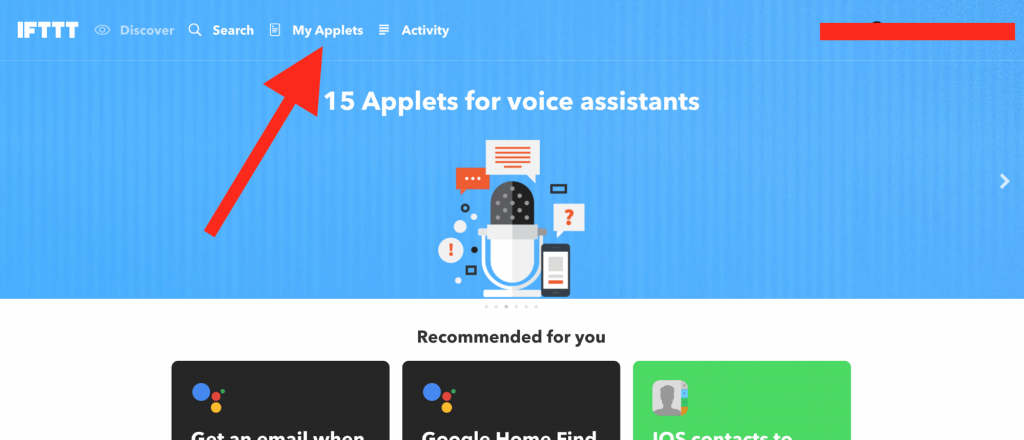
Now click on My Applets then click on new applets at right corner
Step 1. Create a new Applet
After clicking on New Applet, you will have the following screen where you need to connect services in order to make them work
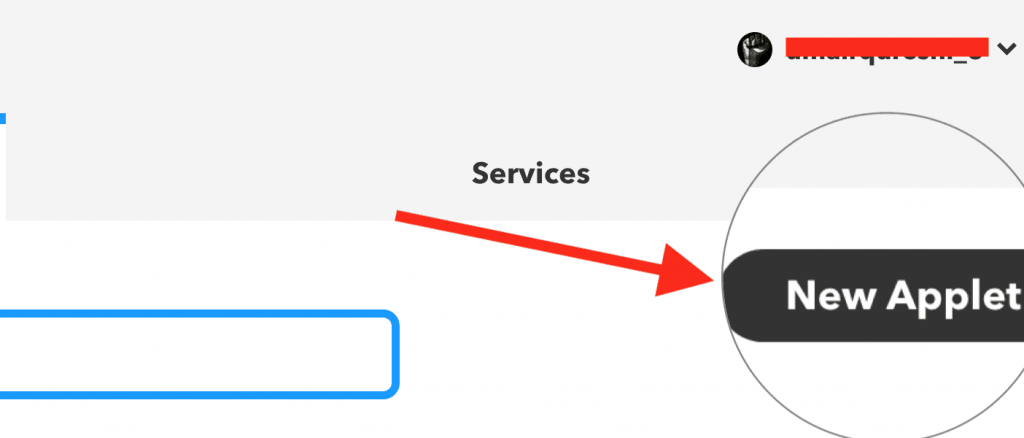
Click on + this button, that will take you to new screen, where you can select the services you want to integrate
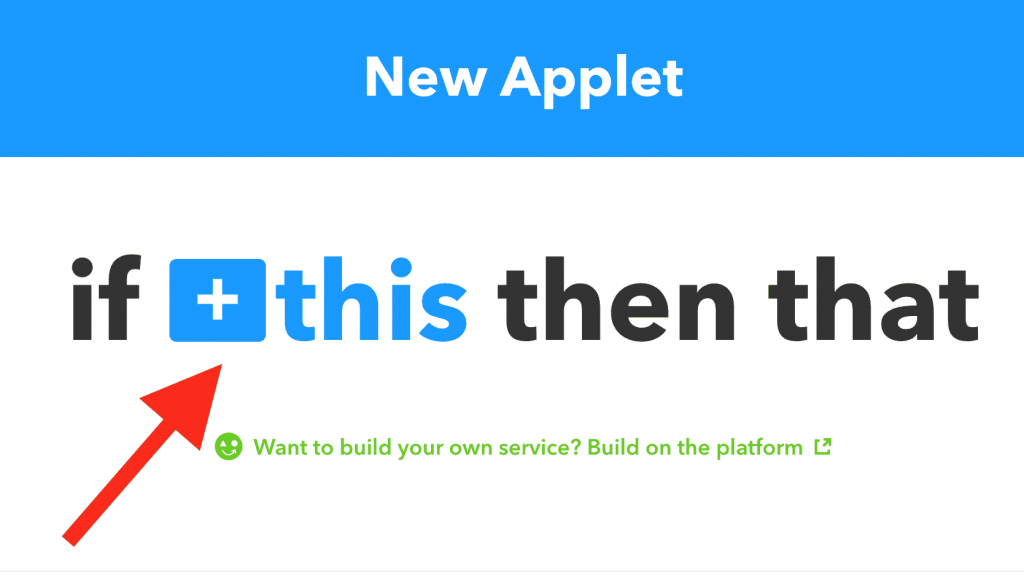
Step 3. Select Service for “this”
As we are going to publish post on our Facebook page, when an event occurs at Google Calendar. So select Google calendar from next screen as given below
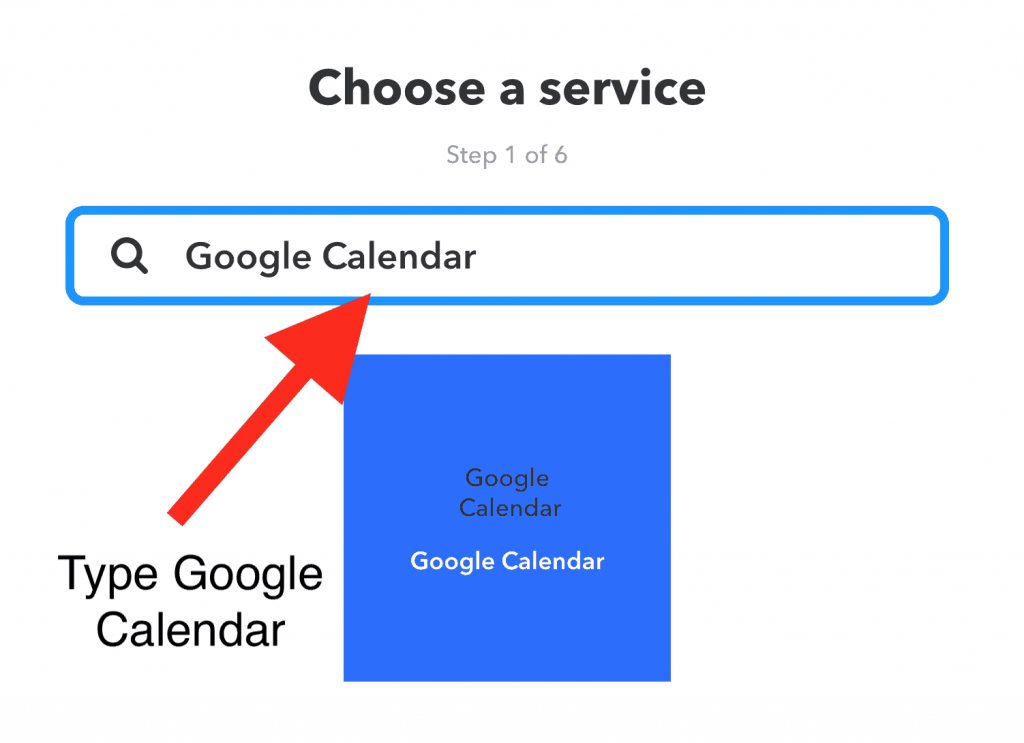
After clicking on Google calendar, it will take you to the next screen, where you can select the trigger which you want to perform
Choose First Trigger
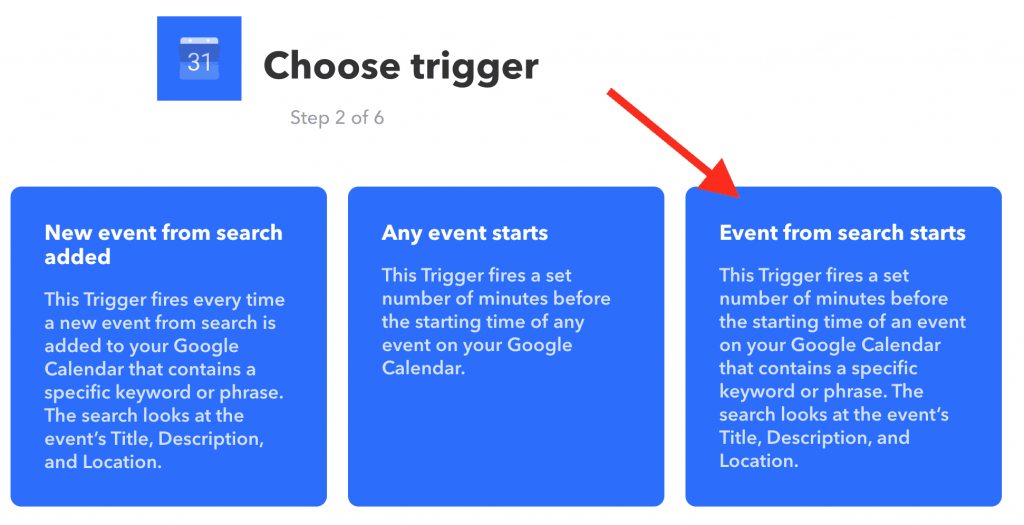
If you are connecting Google calendar with IFTTT for the first time, Google will ask permissions for that
Select third option from the Google Calendar provided services “ Event from search start”
Select this one, as we want to paste our blog post link to Facebook page when an event starts
Step 4. Fill up the details
Fill the details as filled in the image given below
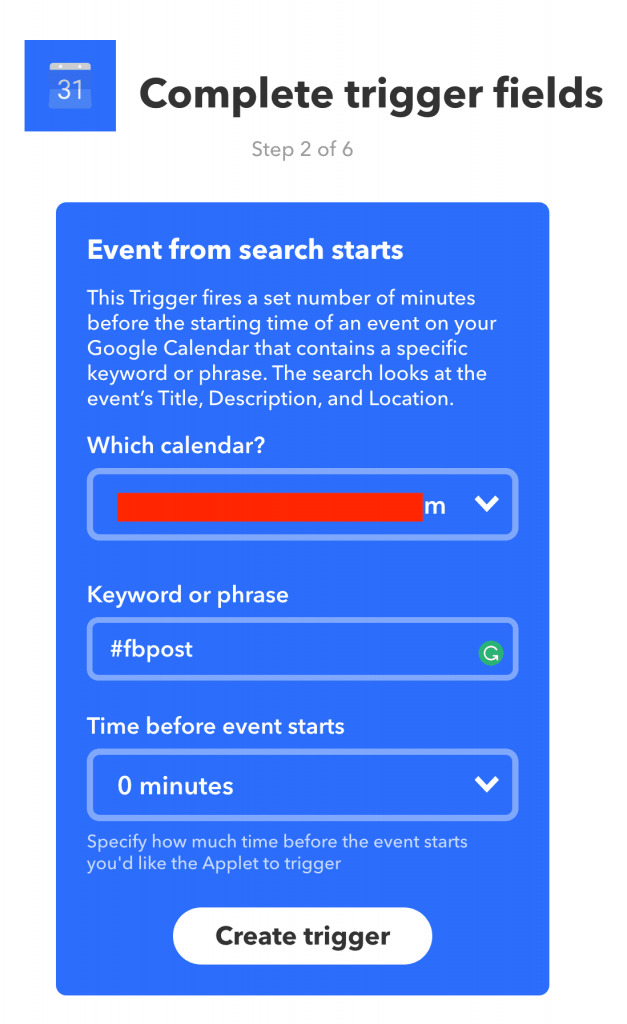
As you have multiple calendars in Google Calendar, so you need to select one calendar from that. You can make one separate calendar for these scheduling posts
Which calendar : select the name of your calendar from dropdown list
Keyword or phrase : Google calendar will search for this keyword, if this keyword is found in some event title, then i will tell IFTTT to perform the required action
Time before event starts : if you want to post your link some time before the event trigger, you can select the time from this dropdown list
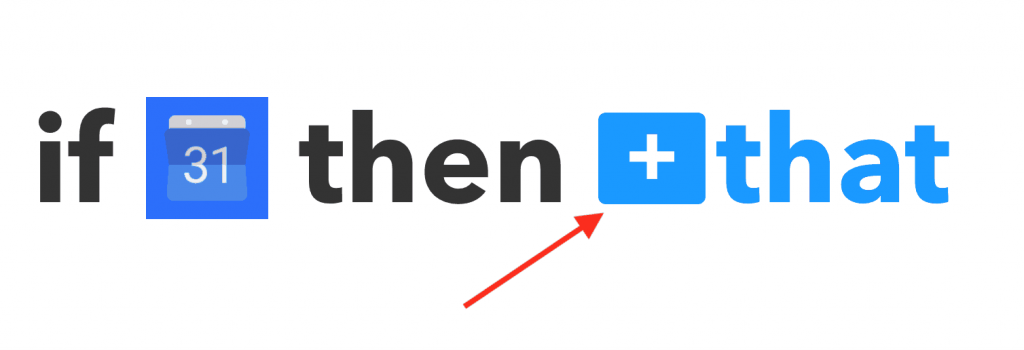
After configuring Google Calendar, you need to click on + that button and select Facebook Pages from the list
Step 5. Select services for “that”
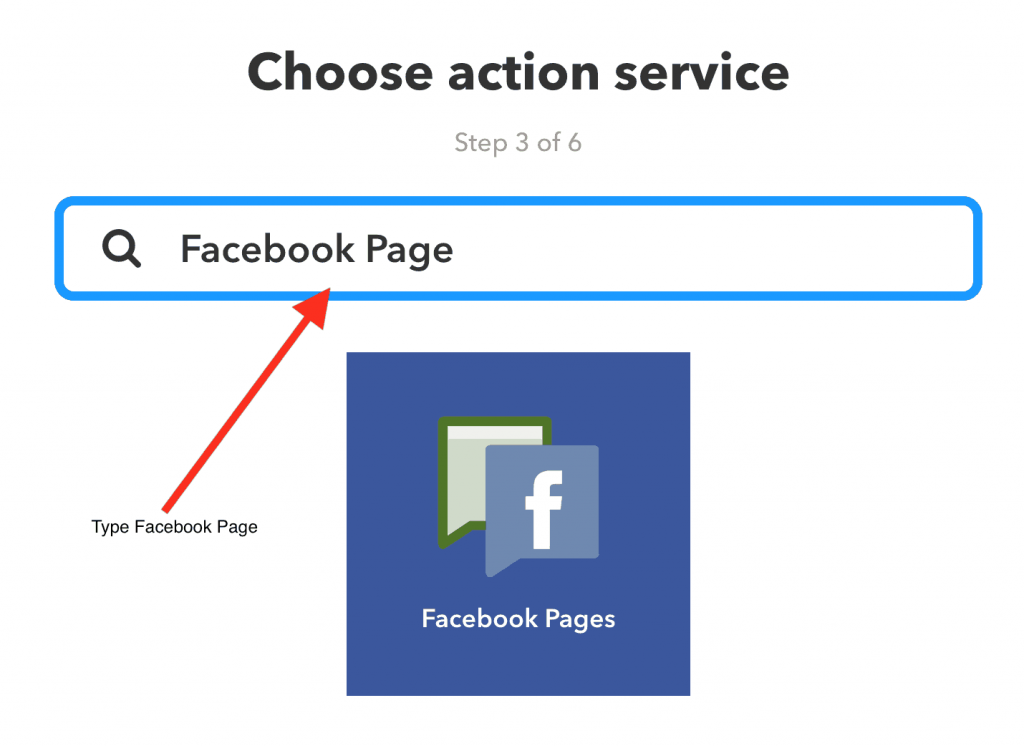
Type “ Facebook Page” in the search bar as given in the image below
Now you can select from different actions, what you want to do. As we want to create a link post on our Facebook Page, so we need to select second option that is “Create a link post” as shown in the image below
Choose Action
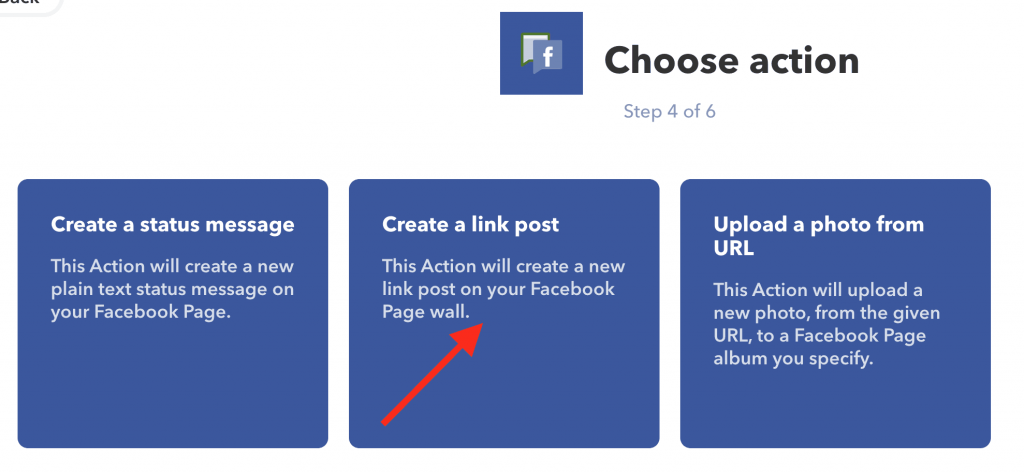
After selecting the trigger, you need to fill the required information to make this applet work
Have a look at the image given below and fill that form
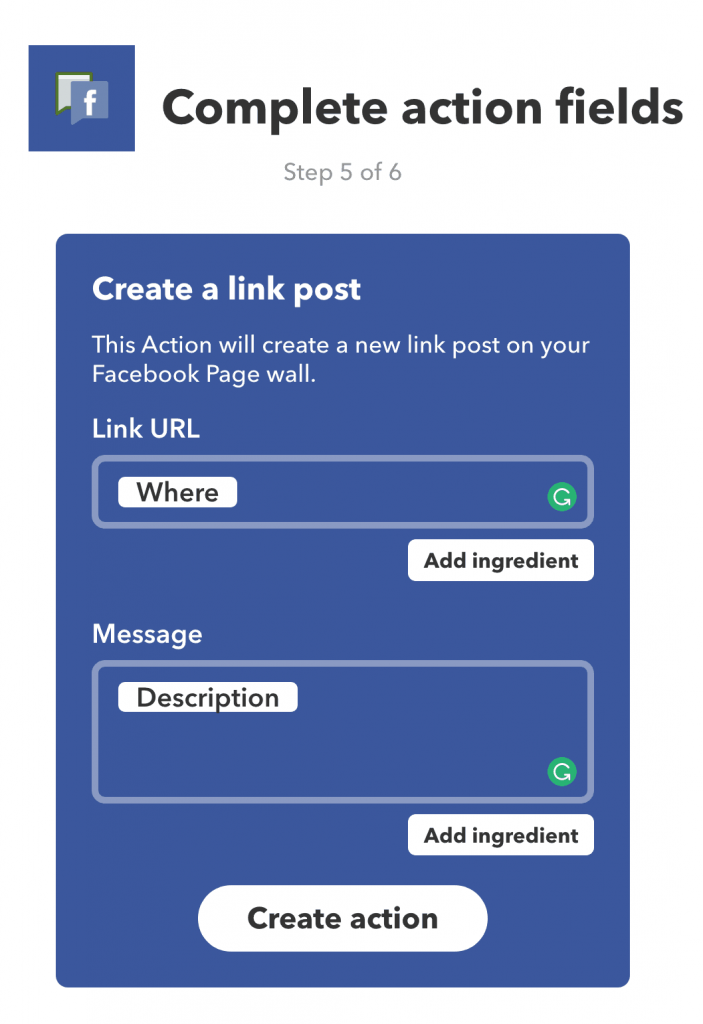
Link URL: select where from Add ingredients, as we will write our link in Google Calendar where field
Message: select Description from Add ingredients, if you want to post link with some description
Step 6. Review and Finish
Finally the last step, review the information you have filled and then click on finish
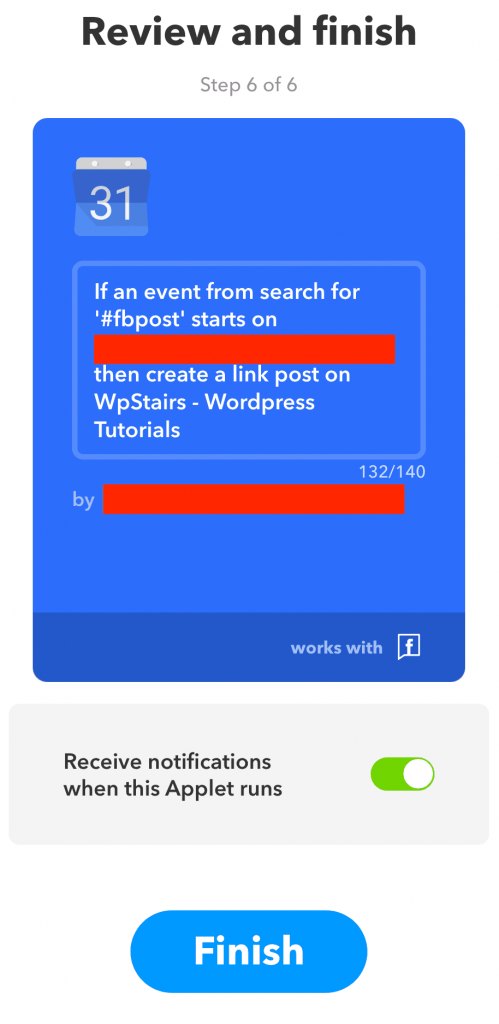
After finishing this, now we will create events on Google Calendar, so that when an event will start, at that time a link post will publish on Facebook Page
Step 7. Create an event on Google Calendar
Go to Google calendar and create a new event. Fill the details as given in the image below
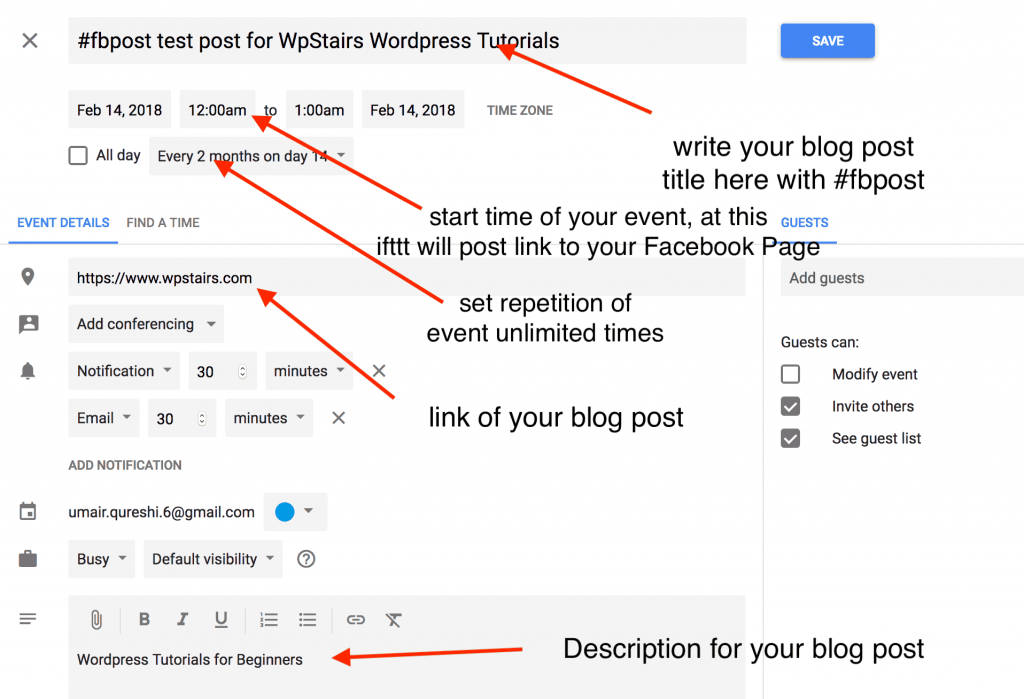
Above image says it all. Now you are done with creating an event on Google calendar. It will post the url to your Facebook Page when this event occurs. This is how we can schedule unlimited blog posts on Facebook for free
It is not easy to make event for every post of your blog, so we can use an excel csv file to save events and import all those events in Google Calendar and then you are done
Soon, will try to share an excel csv file to import events in your Google Calendar
Feel free to ask any questions you have!
8 comments
Tiffany
Very informative post and I think IFTTT is such a big help in organizing social media stuffs. Thanks for sharing ♥️ ♥️ By any chance you are interested on doing collaborations, you can check out the collaborations portal of Phlanx and connect with amazing brands!
Xoxo,
Tiffany
Vox
I am going to bookmark this incredibly valuable resource! Thanks for this step by step guide.
Beth
This is awesome. Thank you for all the detail!
Alexa
This is a really cool post. I’ve never heard of the app. I’ll have to check it out ?
Editorial Team
Thanks 🙂
Feel free to ask any questions you have
Sumam
Thanks for this blog! I was just looking into using this tool for my insta and twitter posts but doing it with FB as well would be great!
Editorial Team
you can use this tool for twitter too
at the moment scheduling post for insta is not supported by IFTTT
but you can cross post your images from Instagram to Twitter, Pinterest, Facebook etc